Migration
Introduction
This is a special feature that allows you to migrate your media from your hosting media library to your cloud storage. The feature is very useful when you want to move your media to cloud storage.
Notice
The feature is only available for Ultimate Media On The Cloud Pro version.
How to migrate media
The migration feature is very easy to use, you can migrate your media in just a few clicks.
Step 1: Go to Ultimate Media On The Cloud > Migration.
The migration page will be displayed. Checkout the migration pre-condition before migrating your media.
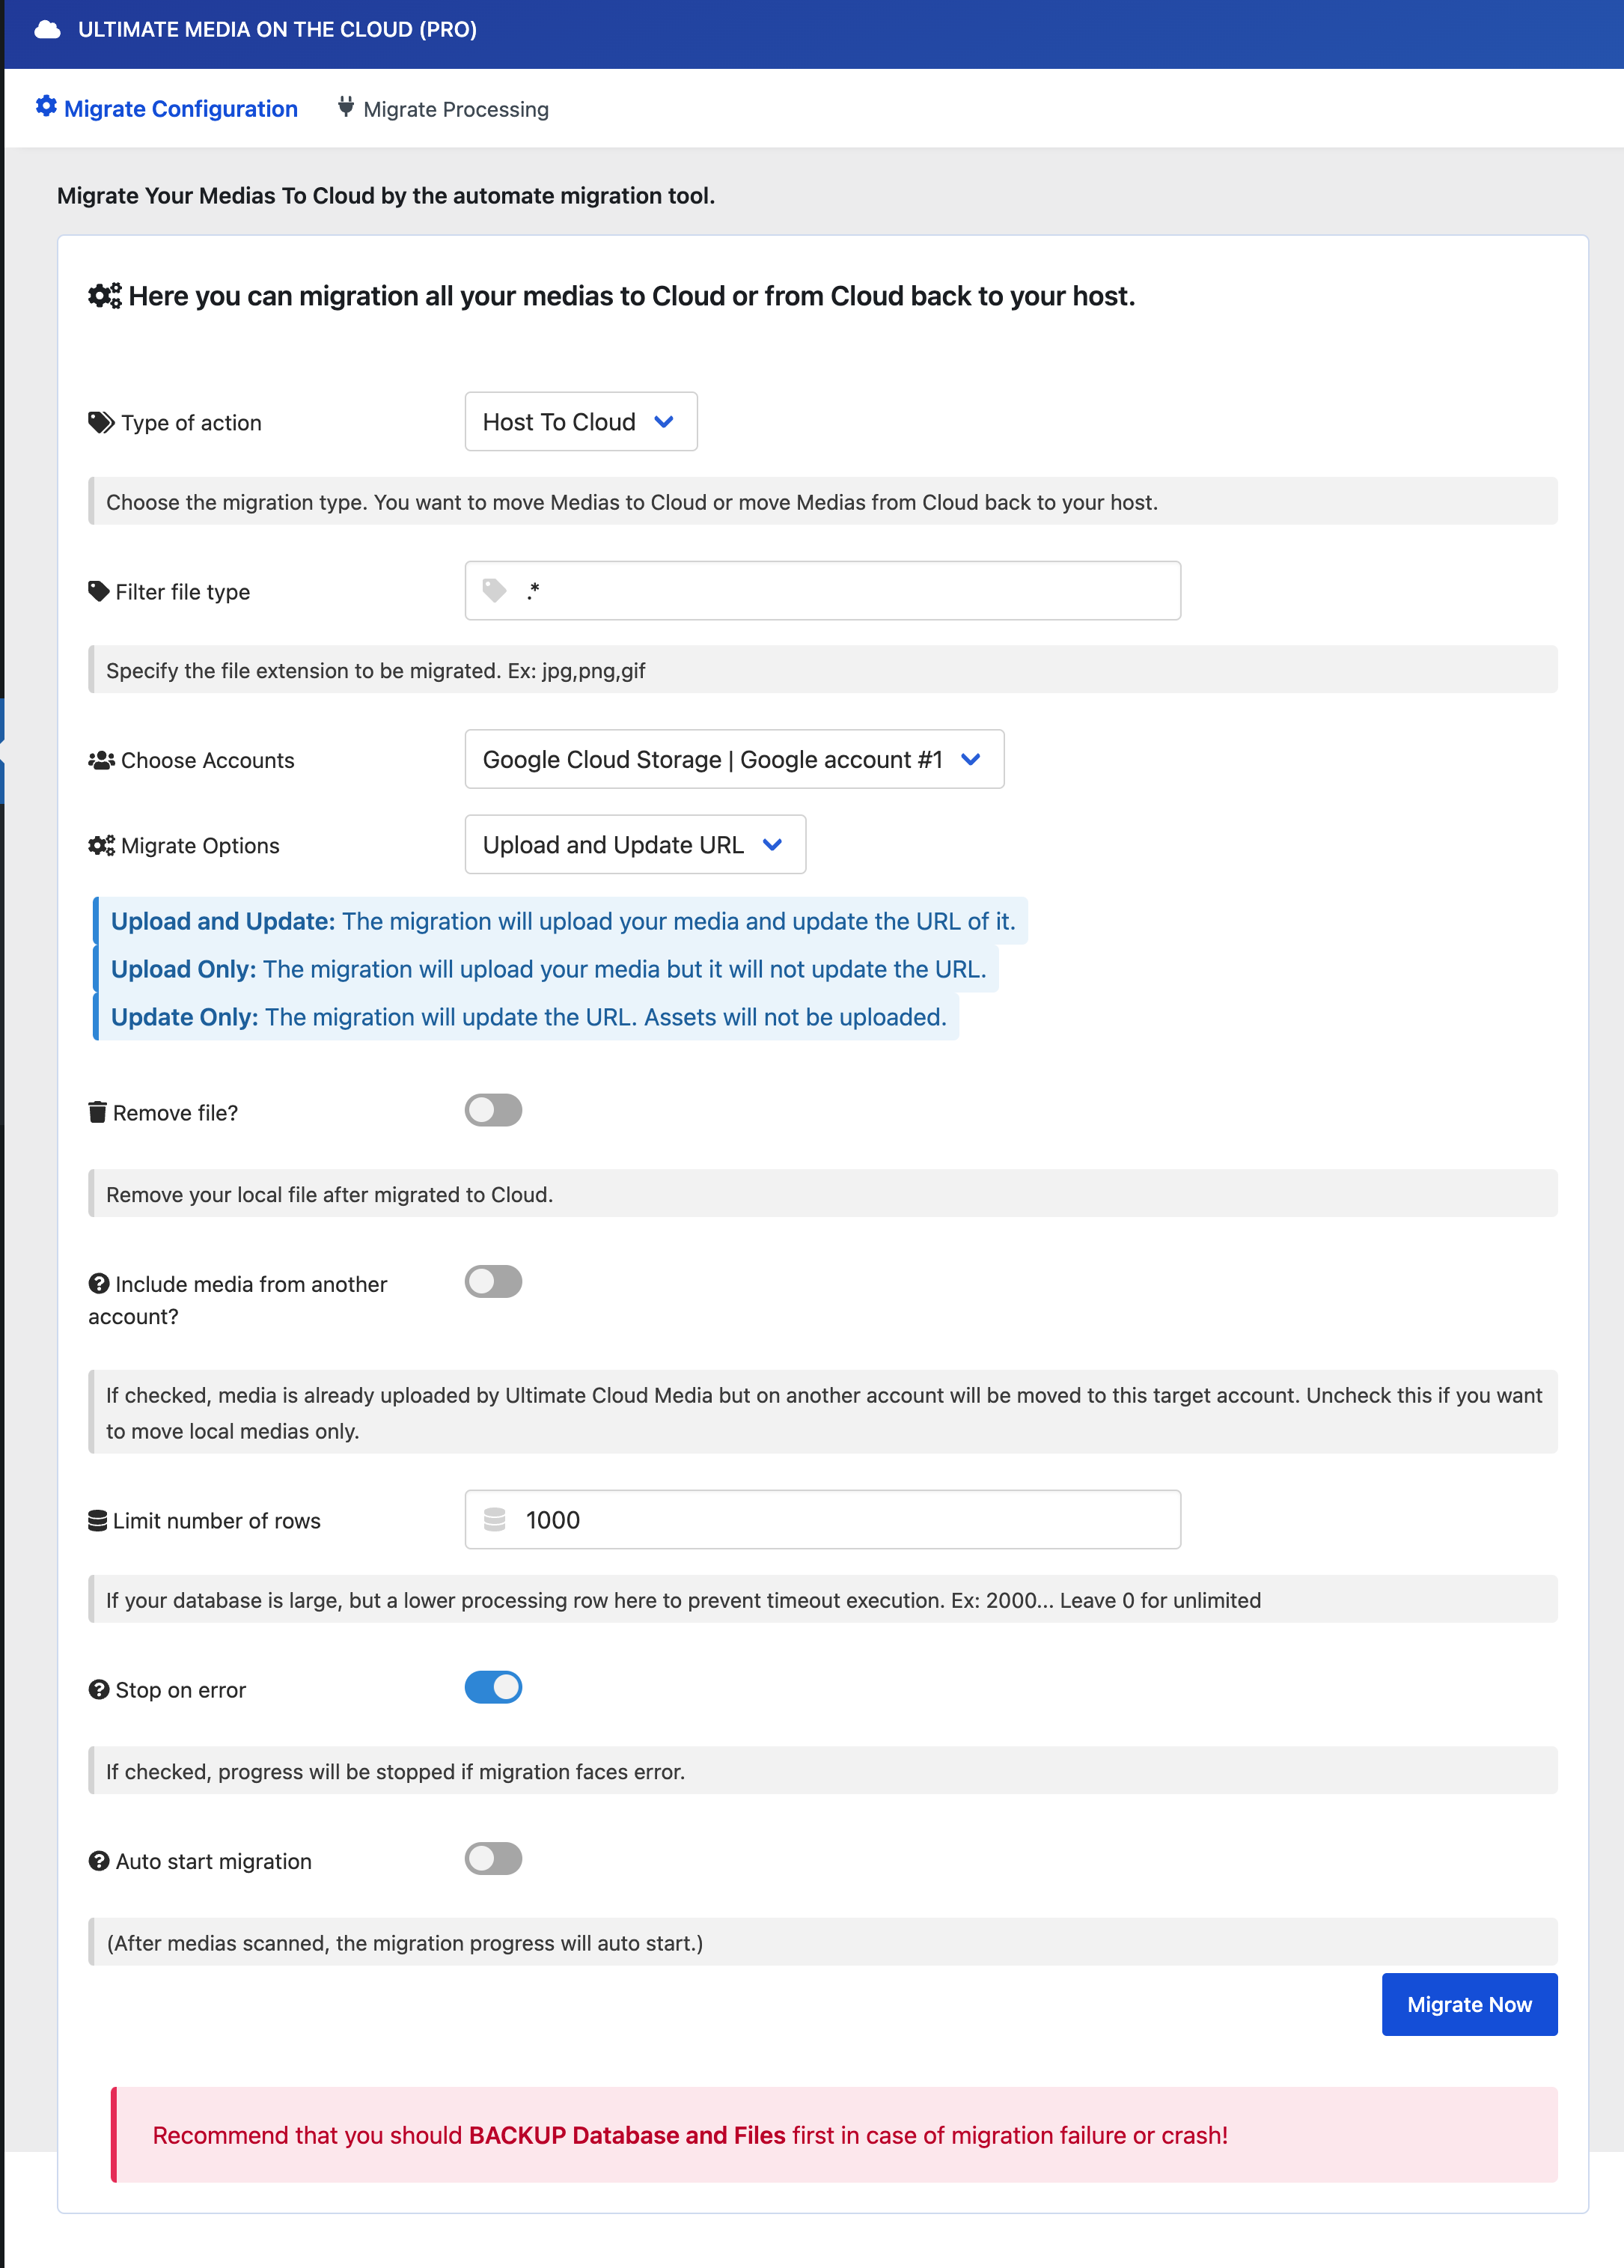
Configuration
- Type of action: Select the type of action you want to use. (Host to cloud or Cloud to host).
- Host to cloud: Migrate media from your hosting media library to your cloud storage.
- Cloud to host: Migrate media from your cloud storage to your hosting media library.
- Filter file type: Select the file type you want to migrate. (Leave .* to migrate all file types).
- Choose Account: Select the cloud account you want to use. (target cloud to migrate media to).
- Migrate Option: Select the migrate option you want to use.
- Upload and Update URL: Full migration, upload media to cloud and update URL.
- Update Only: Update URL only, media will not be uploaded to cloud.
- Upload Only: Upload media to cloud only, URL will not be updated.
Other options:
- Remove file: Delete media after migration.
- Include media from another account: System will include media from another account to migrate.
- Limit number of rows: Limit the number of rows to migrate.
- Stop on error: Stop migration when an error occurs.
- Auto start migration: Start migration automatically when the page is loaded.
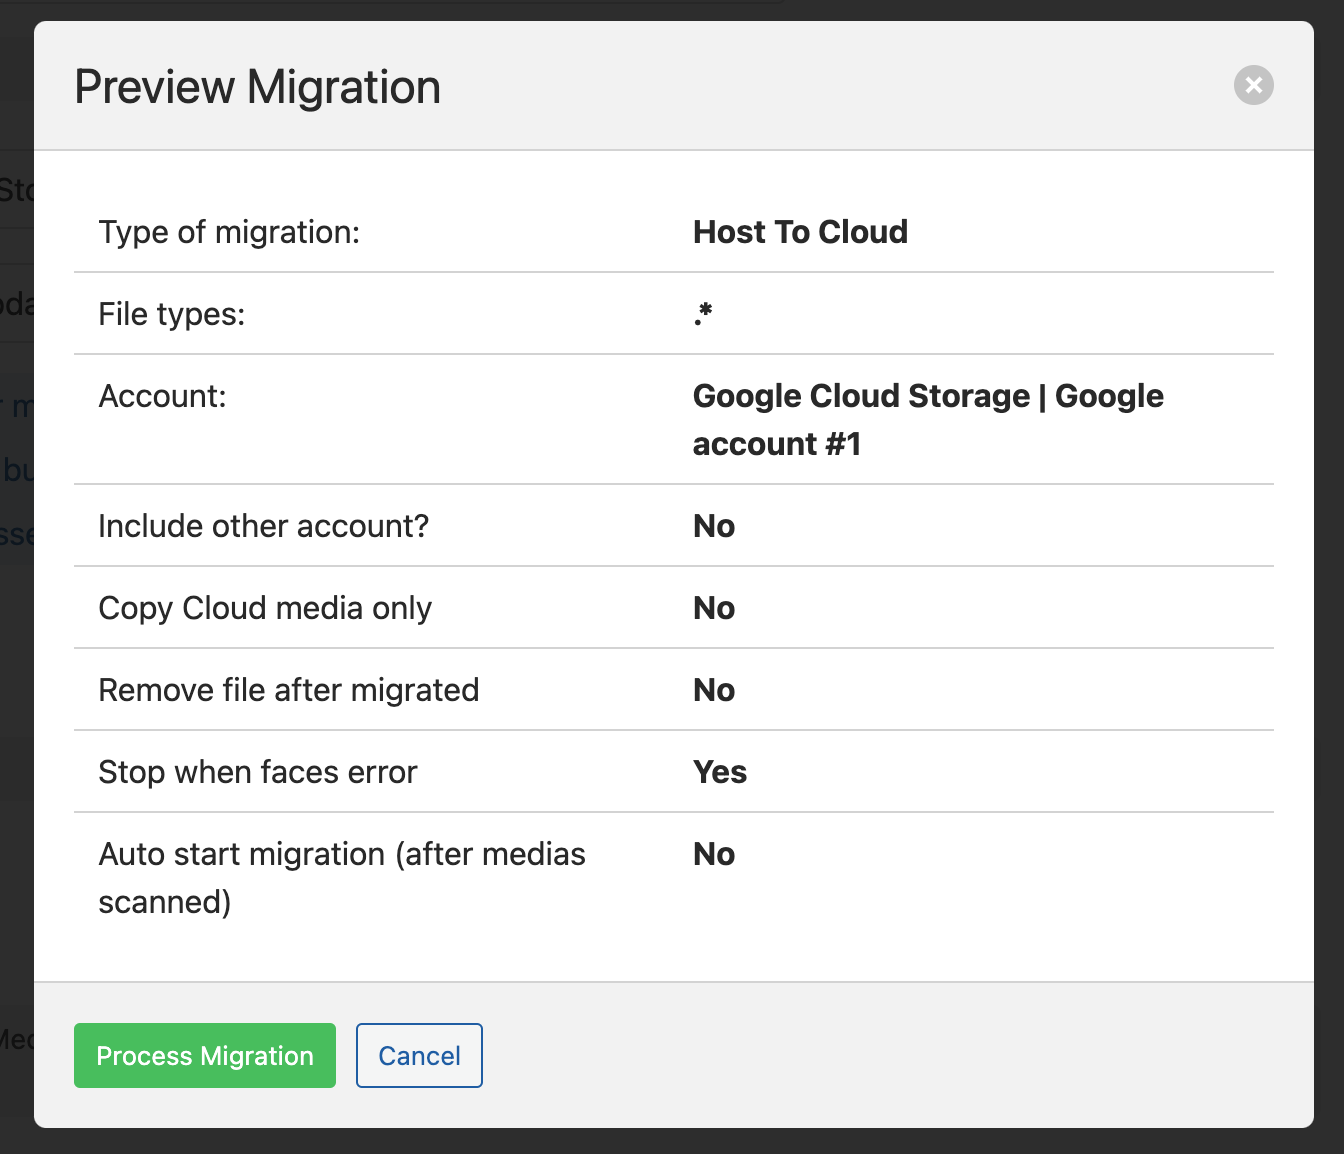
Step 2: Click Migrate Now button to start migration.
Check the preview before starting migration.
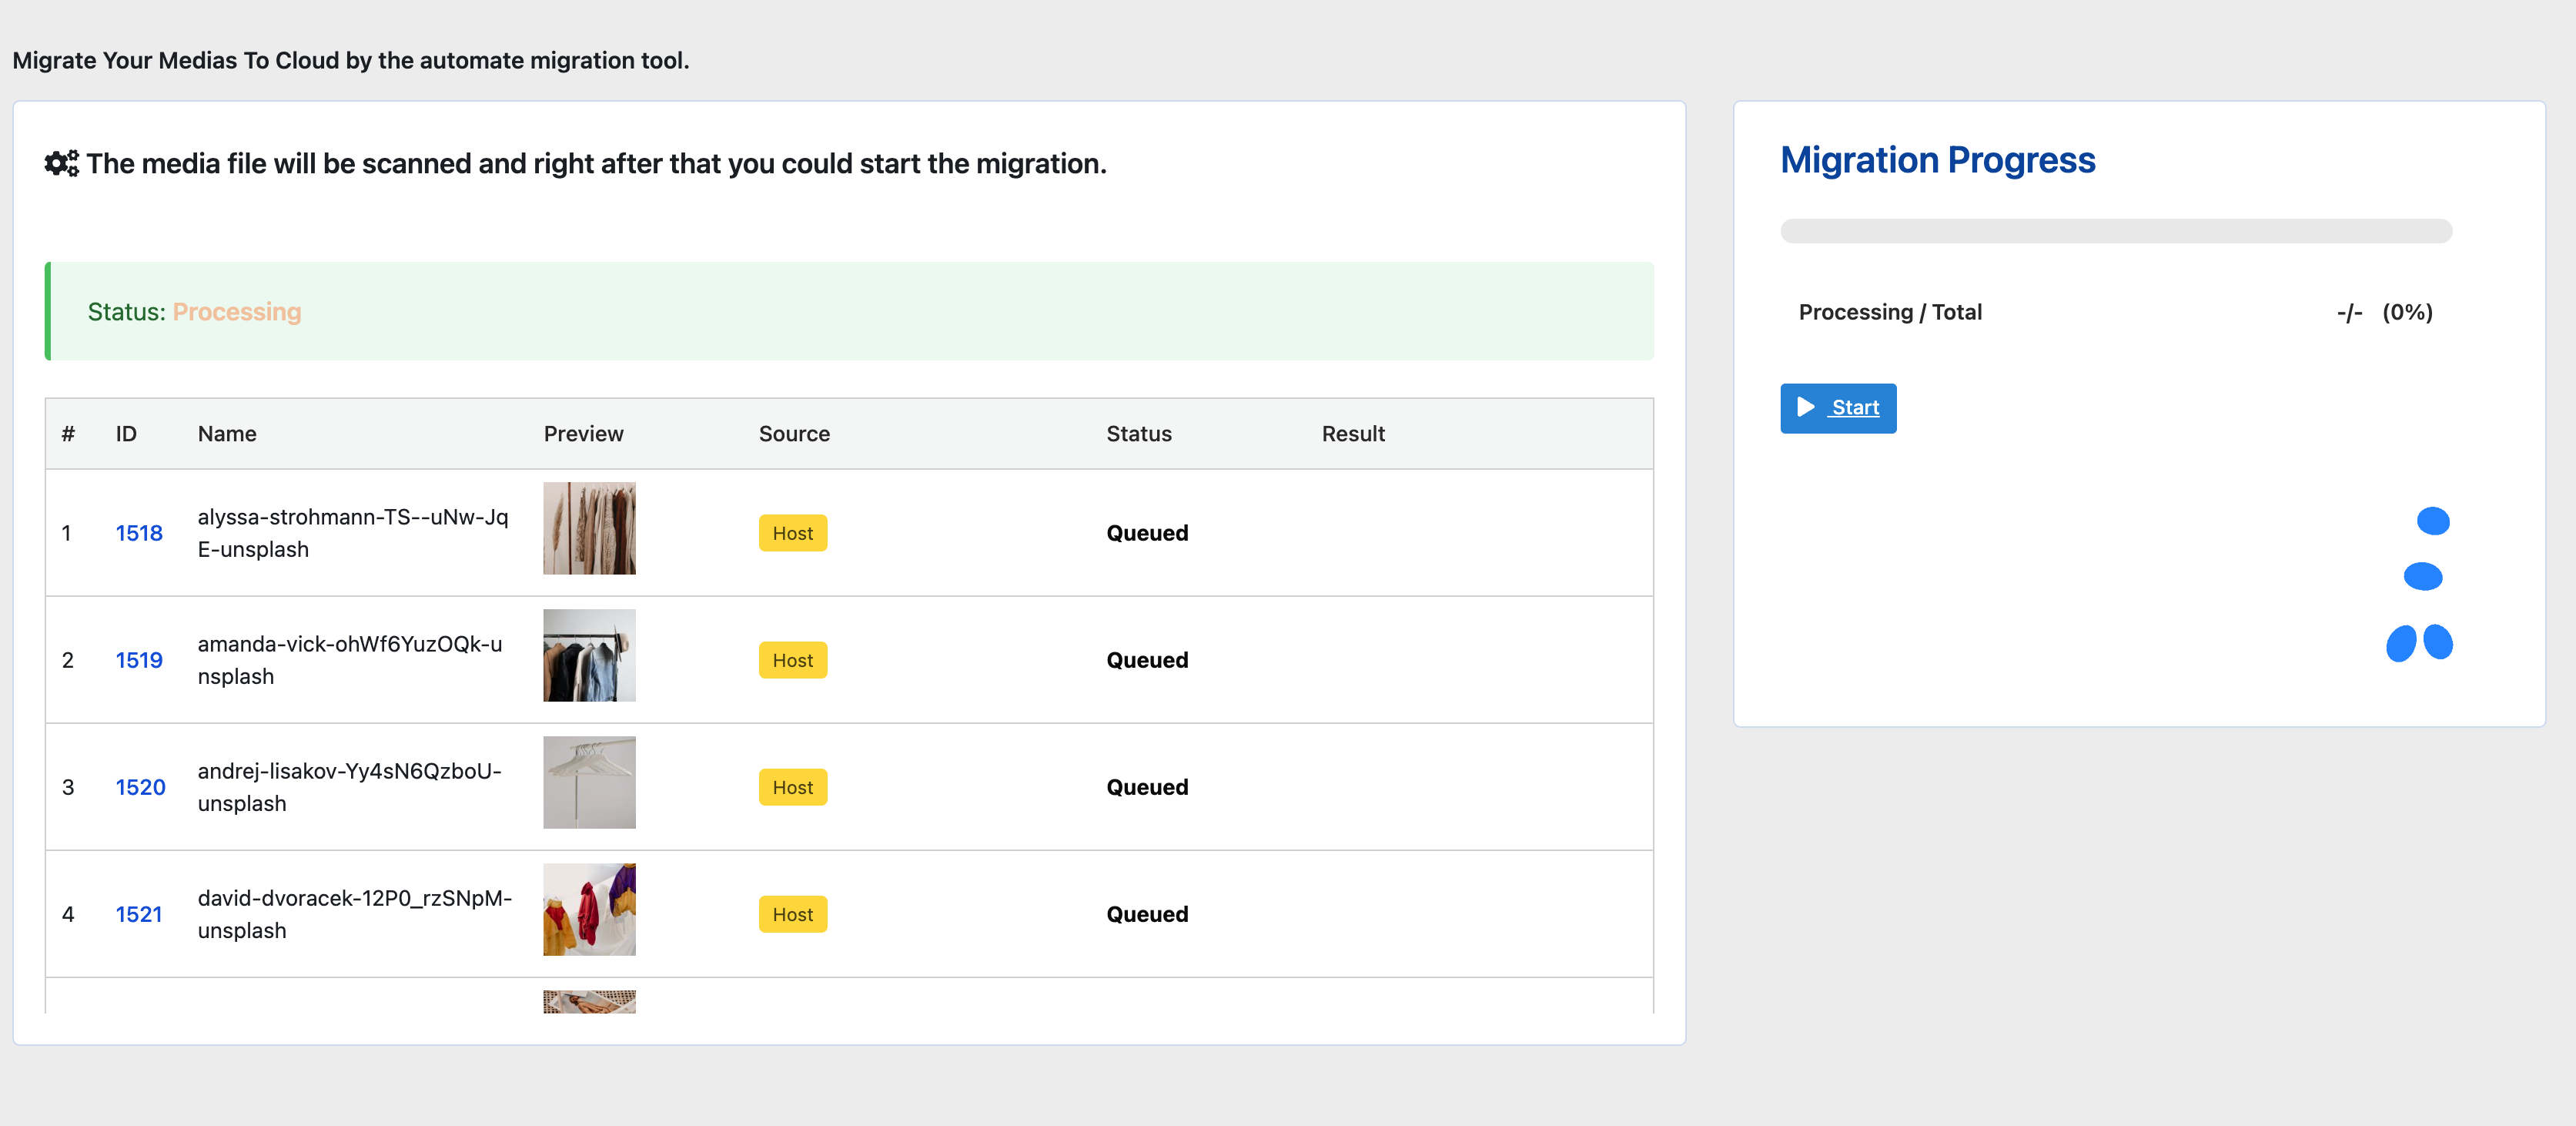
Click Start button to start migration.
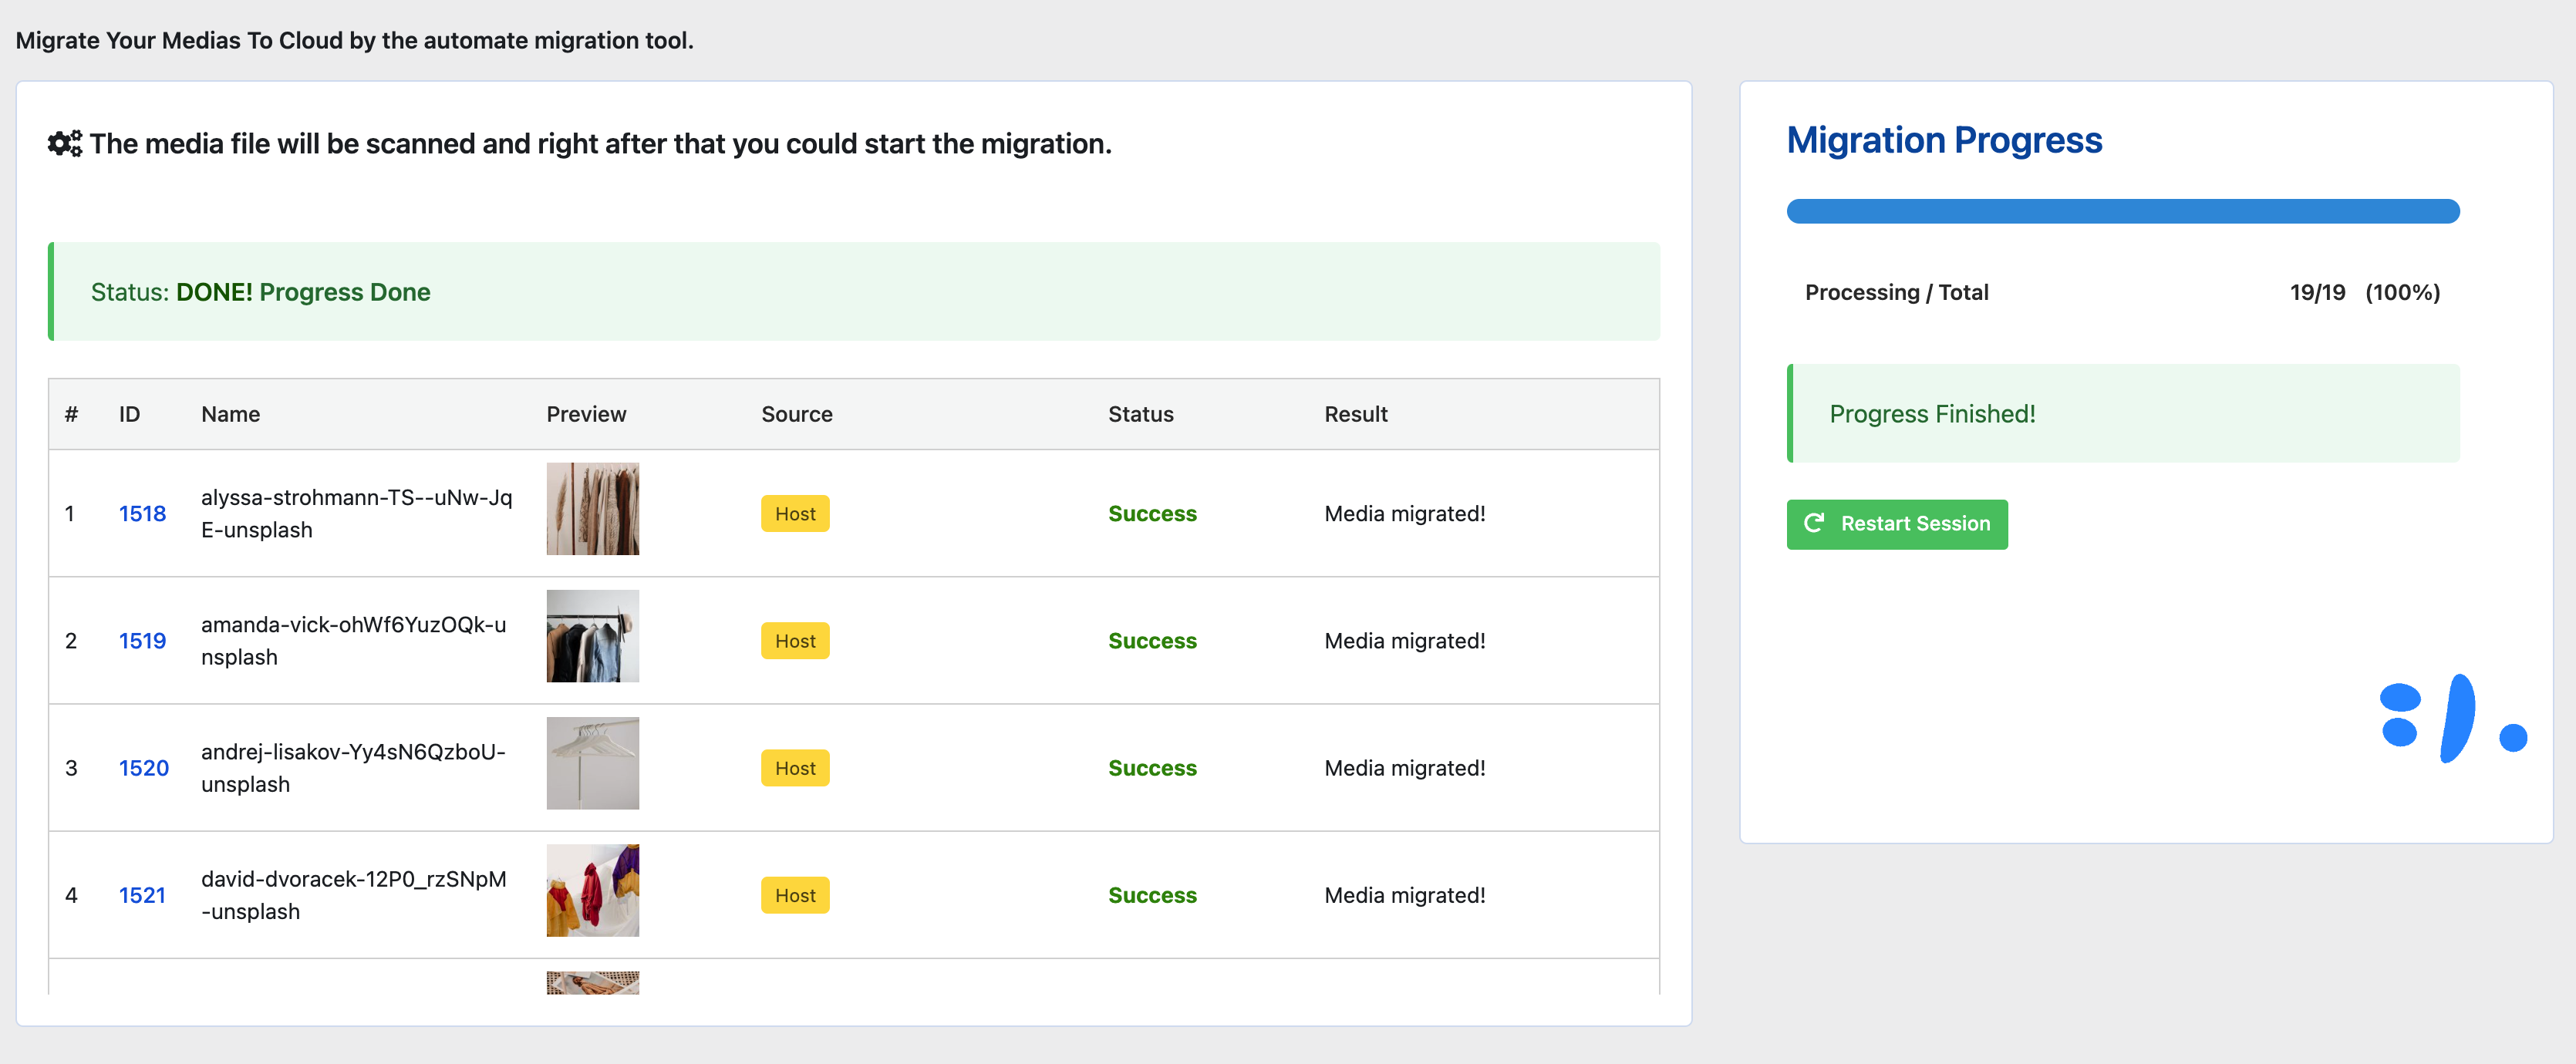
Step 3: Start Migration
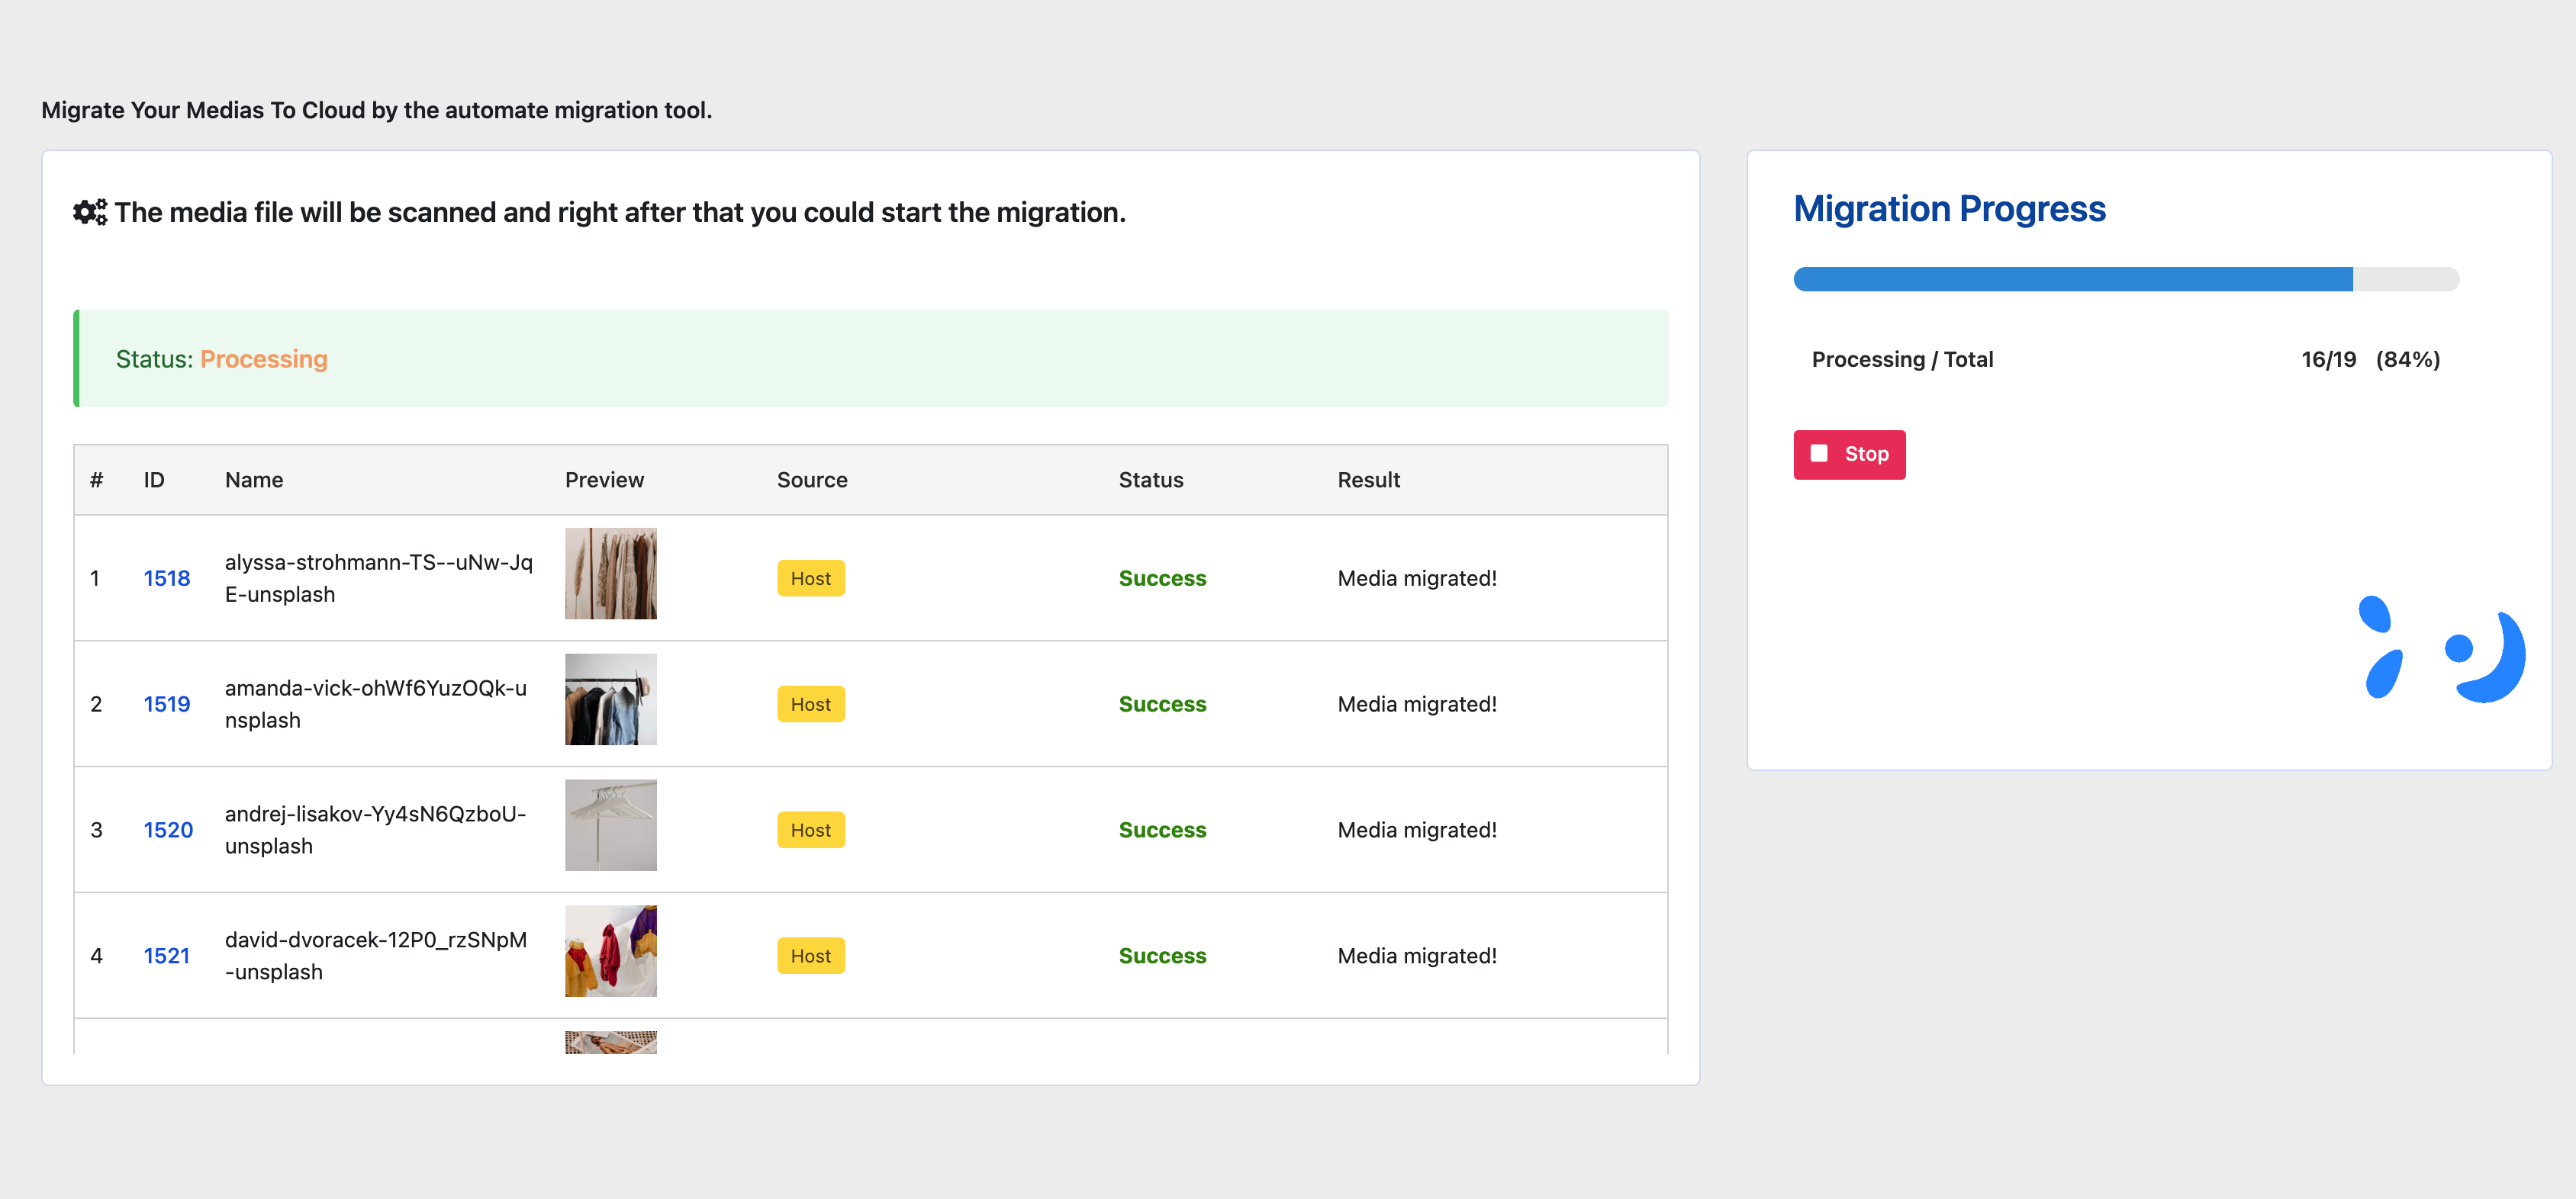
The migration will be started. You can check the migration status in the migration progress.
Note
- You can stop the migration by clicking
Stopbutton. - You can resume the migration by clicking
Resumebutton. - You can restart the migration by clicking
Restartbutton.
After migration is completed, you can check the migration table.
Step 4: Finish Migration
After migration is completed, you can check the migration table.
After migration is finish, you could go back to Media Library to check the media.